
|
Last Site Update: April 22nd, 2024 | Latest Version: 12.0.0 |
|
|
|
|
|
|
|
|
|
|
|
|
|
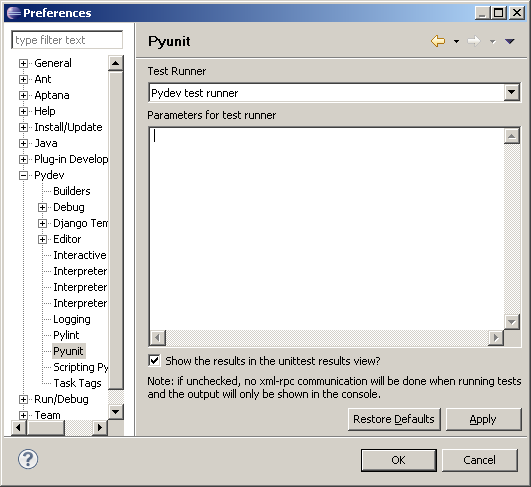
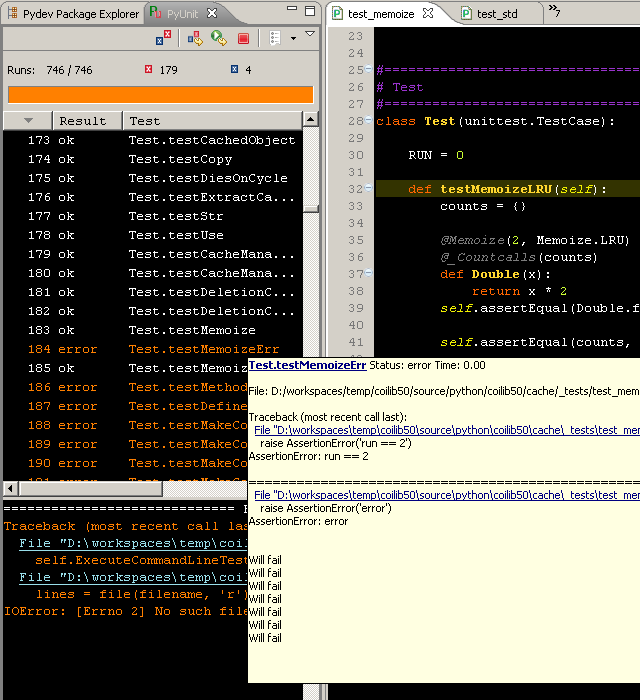
Unittest integrationOn PyDev 1.6.4, an improved unittest support was introduced. It allows using different test runners (the default PyDev test runner, nose or py.test) and allows seeing the results in a view (PyUnit view) with a red/green bar which also allows re-running tests. Configuring test runnersThe preferences page to configure the test runner is accessible from the PyUnit view at the dropdown menu > configure test runner preferences (or at window > preferences > PyDev > PyUnit)
Configuring the PyDev test runnerThe options that the PyDev unittest accepts are: --verbosity=number --jobs=number --split_jobs=tests|module An example of options that can be set in the preferences would be: --verbosity=1 --jobs=2 --split_jobs=module Configuring the Nose test runnerNote: the integration was tested with version 1.0 The options that the nose test runner accepts can be found at http://nose.readthedocs.io An example of options that can be set in the preferences would be: --verbosity=2 --processes=2 --verbosity=2 (set the verbosity level to 2) --processes=2 (use 2 processes to run the tests) Configuring the Py.test test runnerNote: the integration was tested with version 2.0 The options that the py.test test runner accepts can be found at http://pytest.org An example of options that can be set in the preferences would be: -maxfail=2 --tb=native -maxfail=2 (stop at 2nd failure) --tb=native (will show tracebacks in the default standard library formatting) Note: currently when using the xdist plugin, the results won't be properly shown in the PyUnit view. PyUnit viewThe PyUnit view may be used to see the results of tests being run, their output, time, re-running tests, among others.
And the most interesting actions are:
Running and showing results in the PyUnit viewTo show the results in the PyUnit view, a unittest run must be done. If running the tests when editing a module, Ctrl+F9 may be used to run the tests in that mode (and choosing which tests should be run), otherwise, right-click a folder or python file and choose Run as > Python Unittest
|
PyDev developmentPyDev is open source and depends on your contributions! This may be in the form of bug fixes, answers on stackoverflow, new features...Another option is financially supporting it at: Patreon (which provides a way to support it monthly and get rewards starting with $1). 
Or through 1-time contributions at: Paypal 

Search PyDev-related content |
|
|
|
|
Copyright: Brainwy Software Ltda, 2014-2021 |